Five Favorite Bible Resources that are Perfect for Summer Play + Learning

Since we’ve begun homeschooling, we always wrap up our school year in mid-May. It’s when Minnesota starts to wake up and everyone feels ready to be outside, have less structure, and put our books away for a bit.

But, inevitably, there comes a day when everyone needs a bit more structure or some kind of planned out activity. So, I wanted to write up a post that shares my top 5 recommendations for resources from the shop and free resources page for summery fun that is Bible-focused. These are all wonderful for those days that you just need a little direction and intention.

My first pick is hands-down either one (or both!) of the Bible Spy School packs (#1 and/or #2). I created these with summertime in mind—so they are really quick, fun, and hands-on. And a lot of activities are best done outside! My boys still talk about doing them, and I’m thinking about revisiting them this year :)

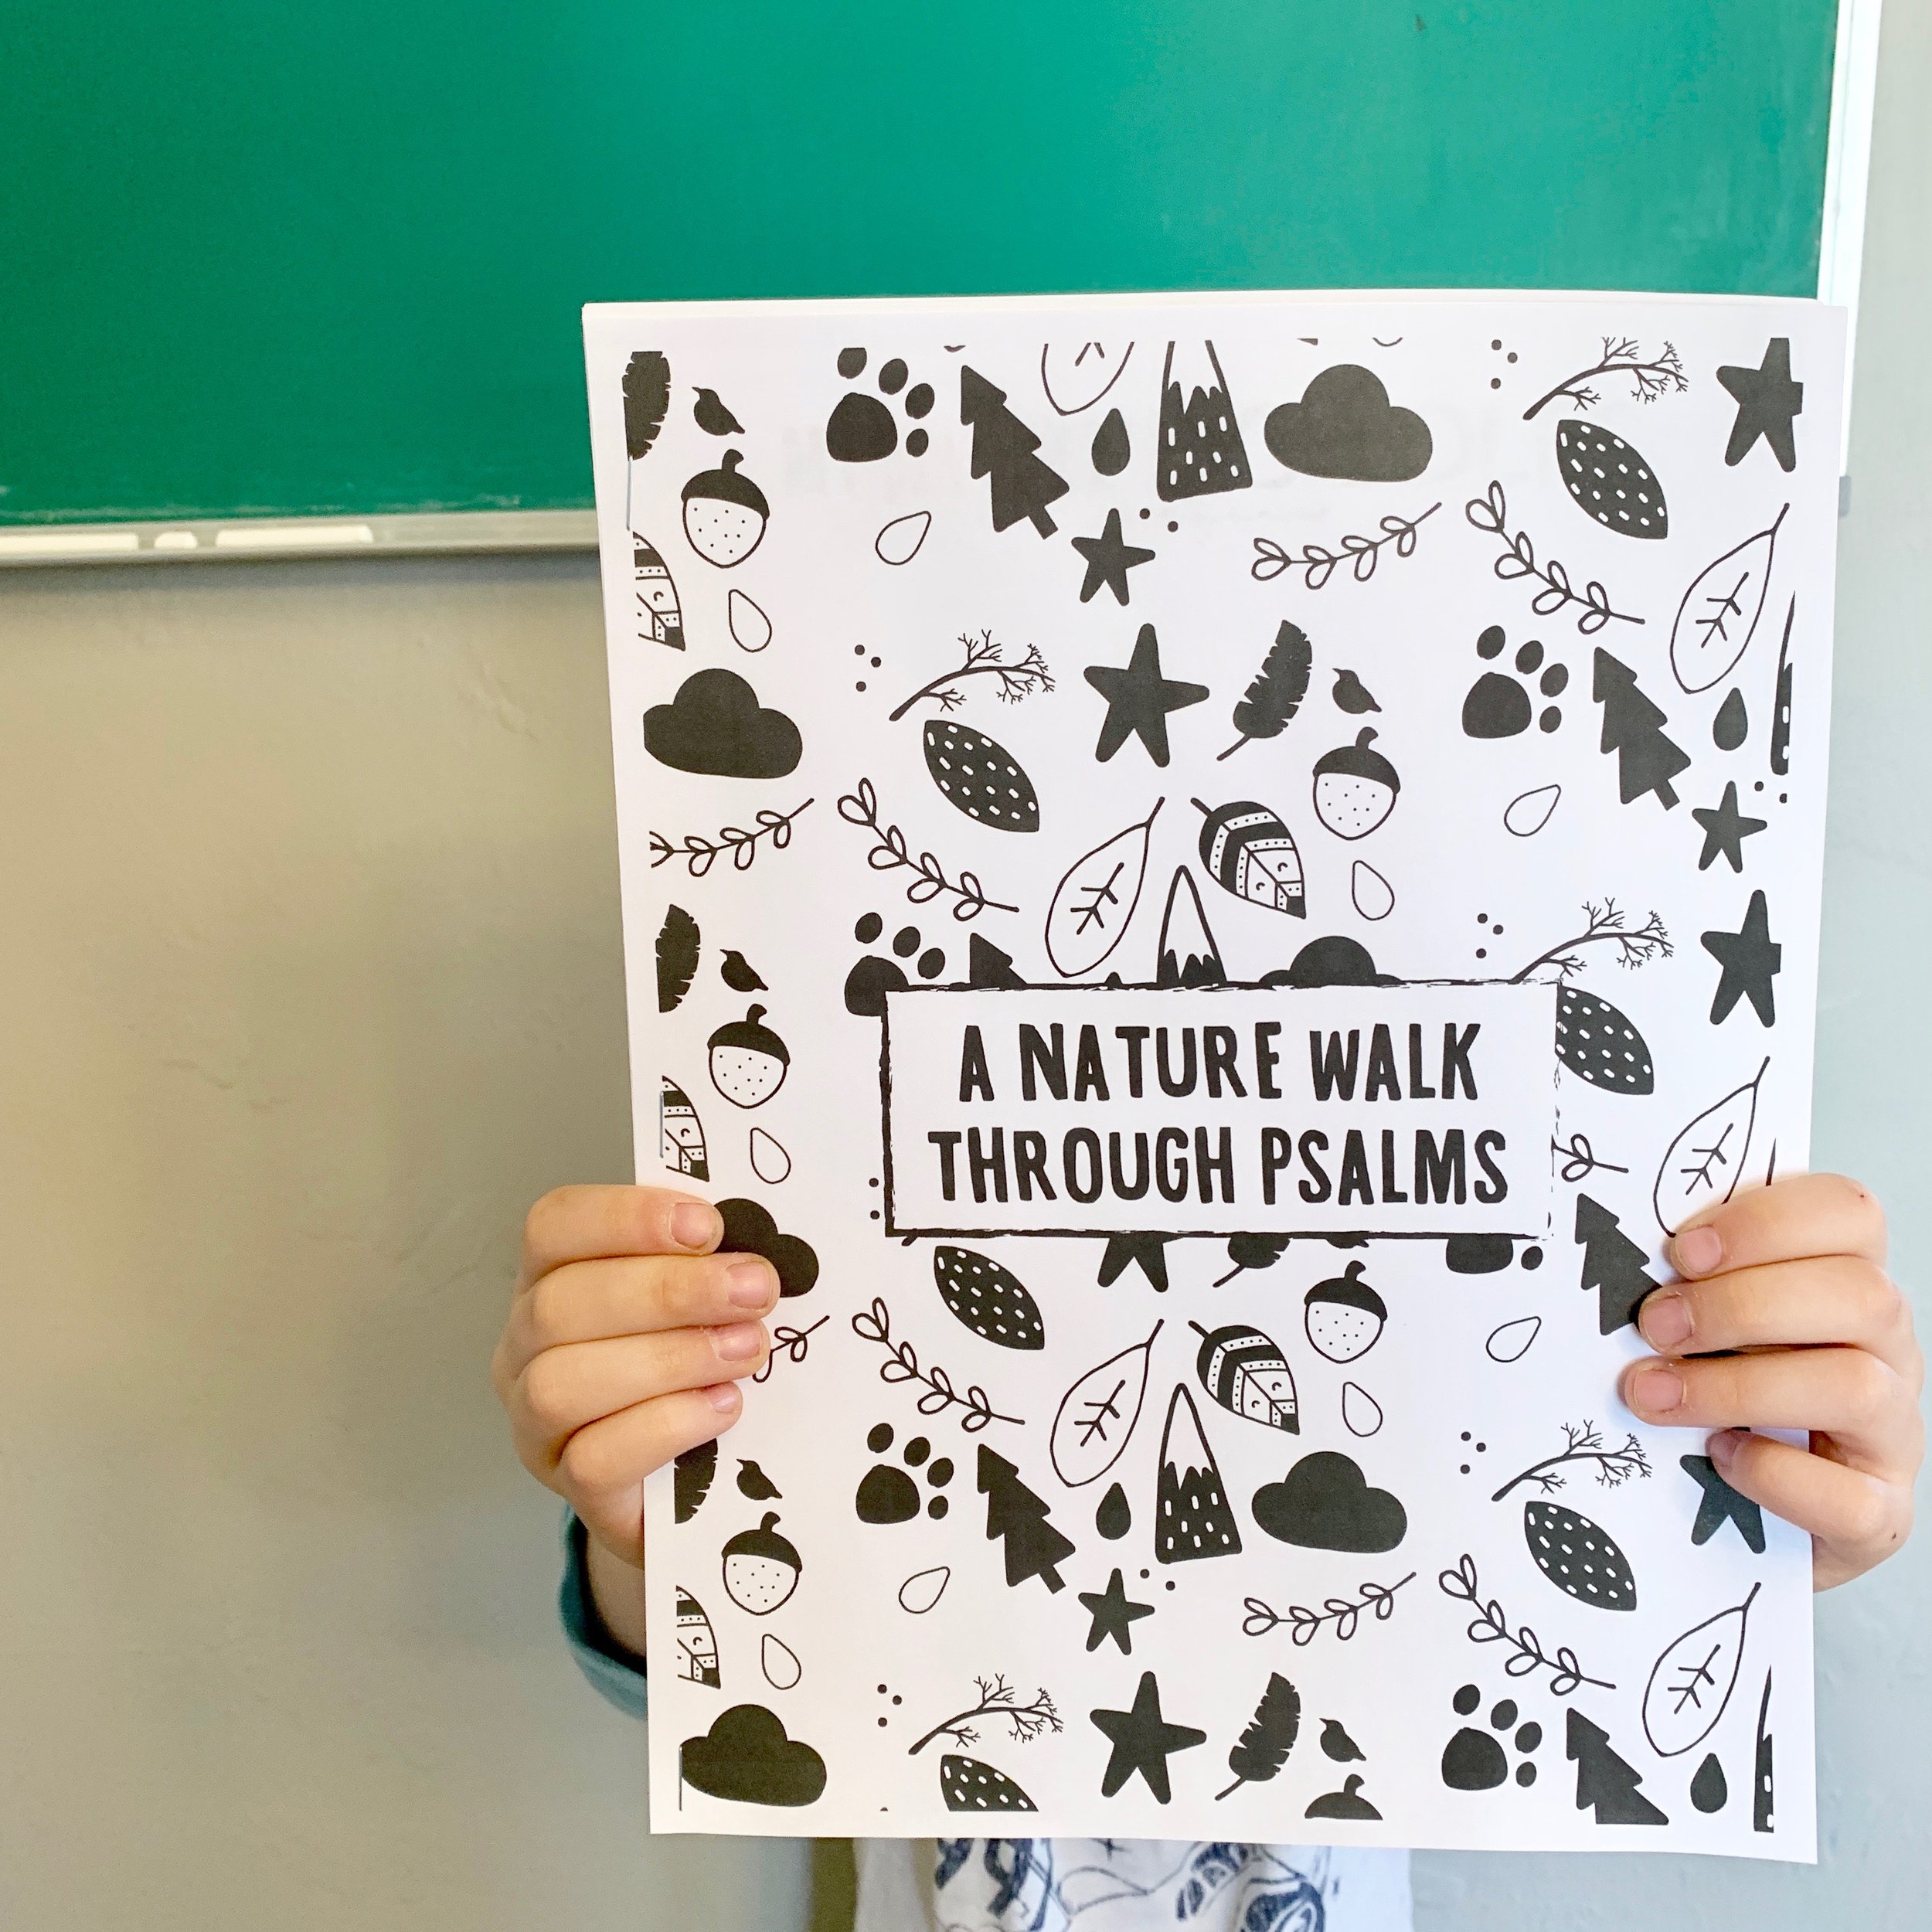
Secondly, I think that a Nature Walk through Psalms is a lovely resource for those budding artists who enjoy summer nature hikes. It’s one of the free resources on the site, so it’s great to grab, print, and use on the fly. Ps. There’s also a summer reading list on the free resource page—just in case you need some library recs for the summer months!

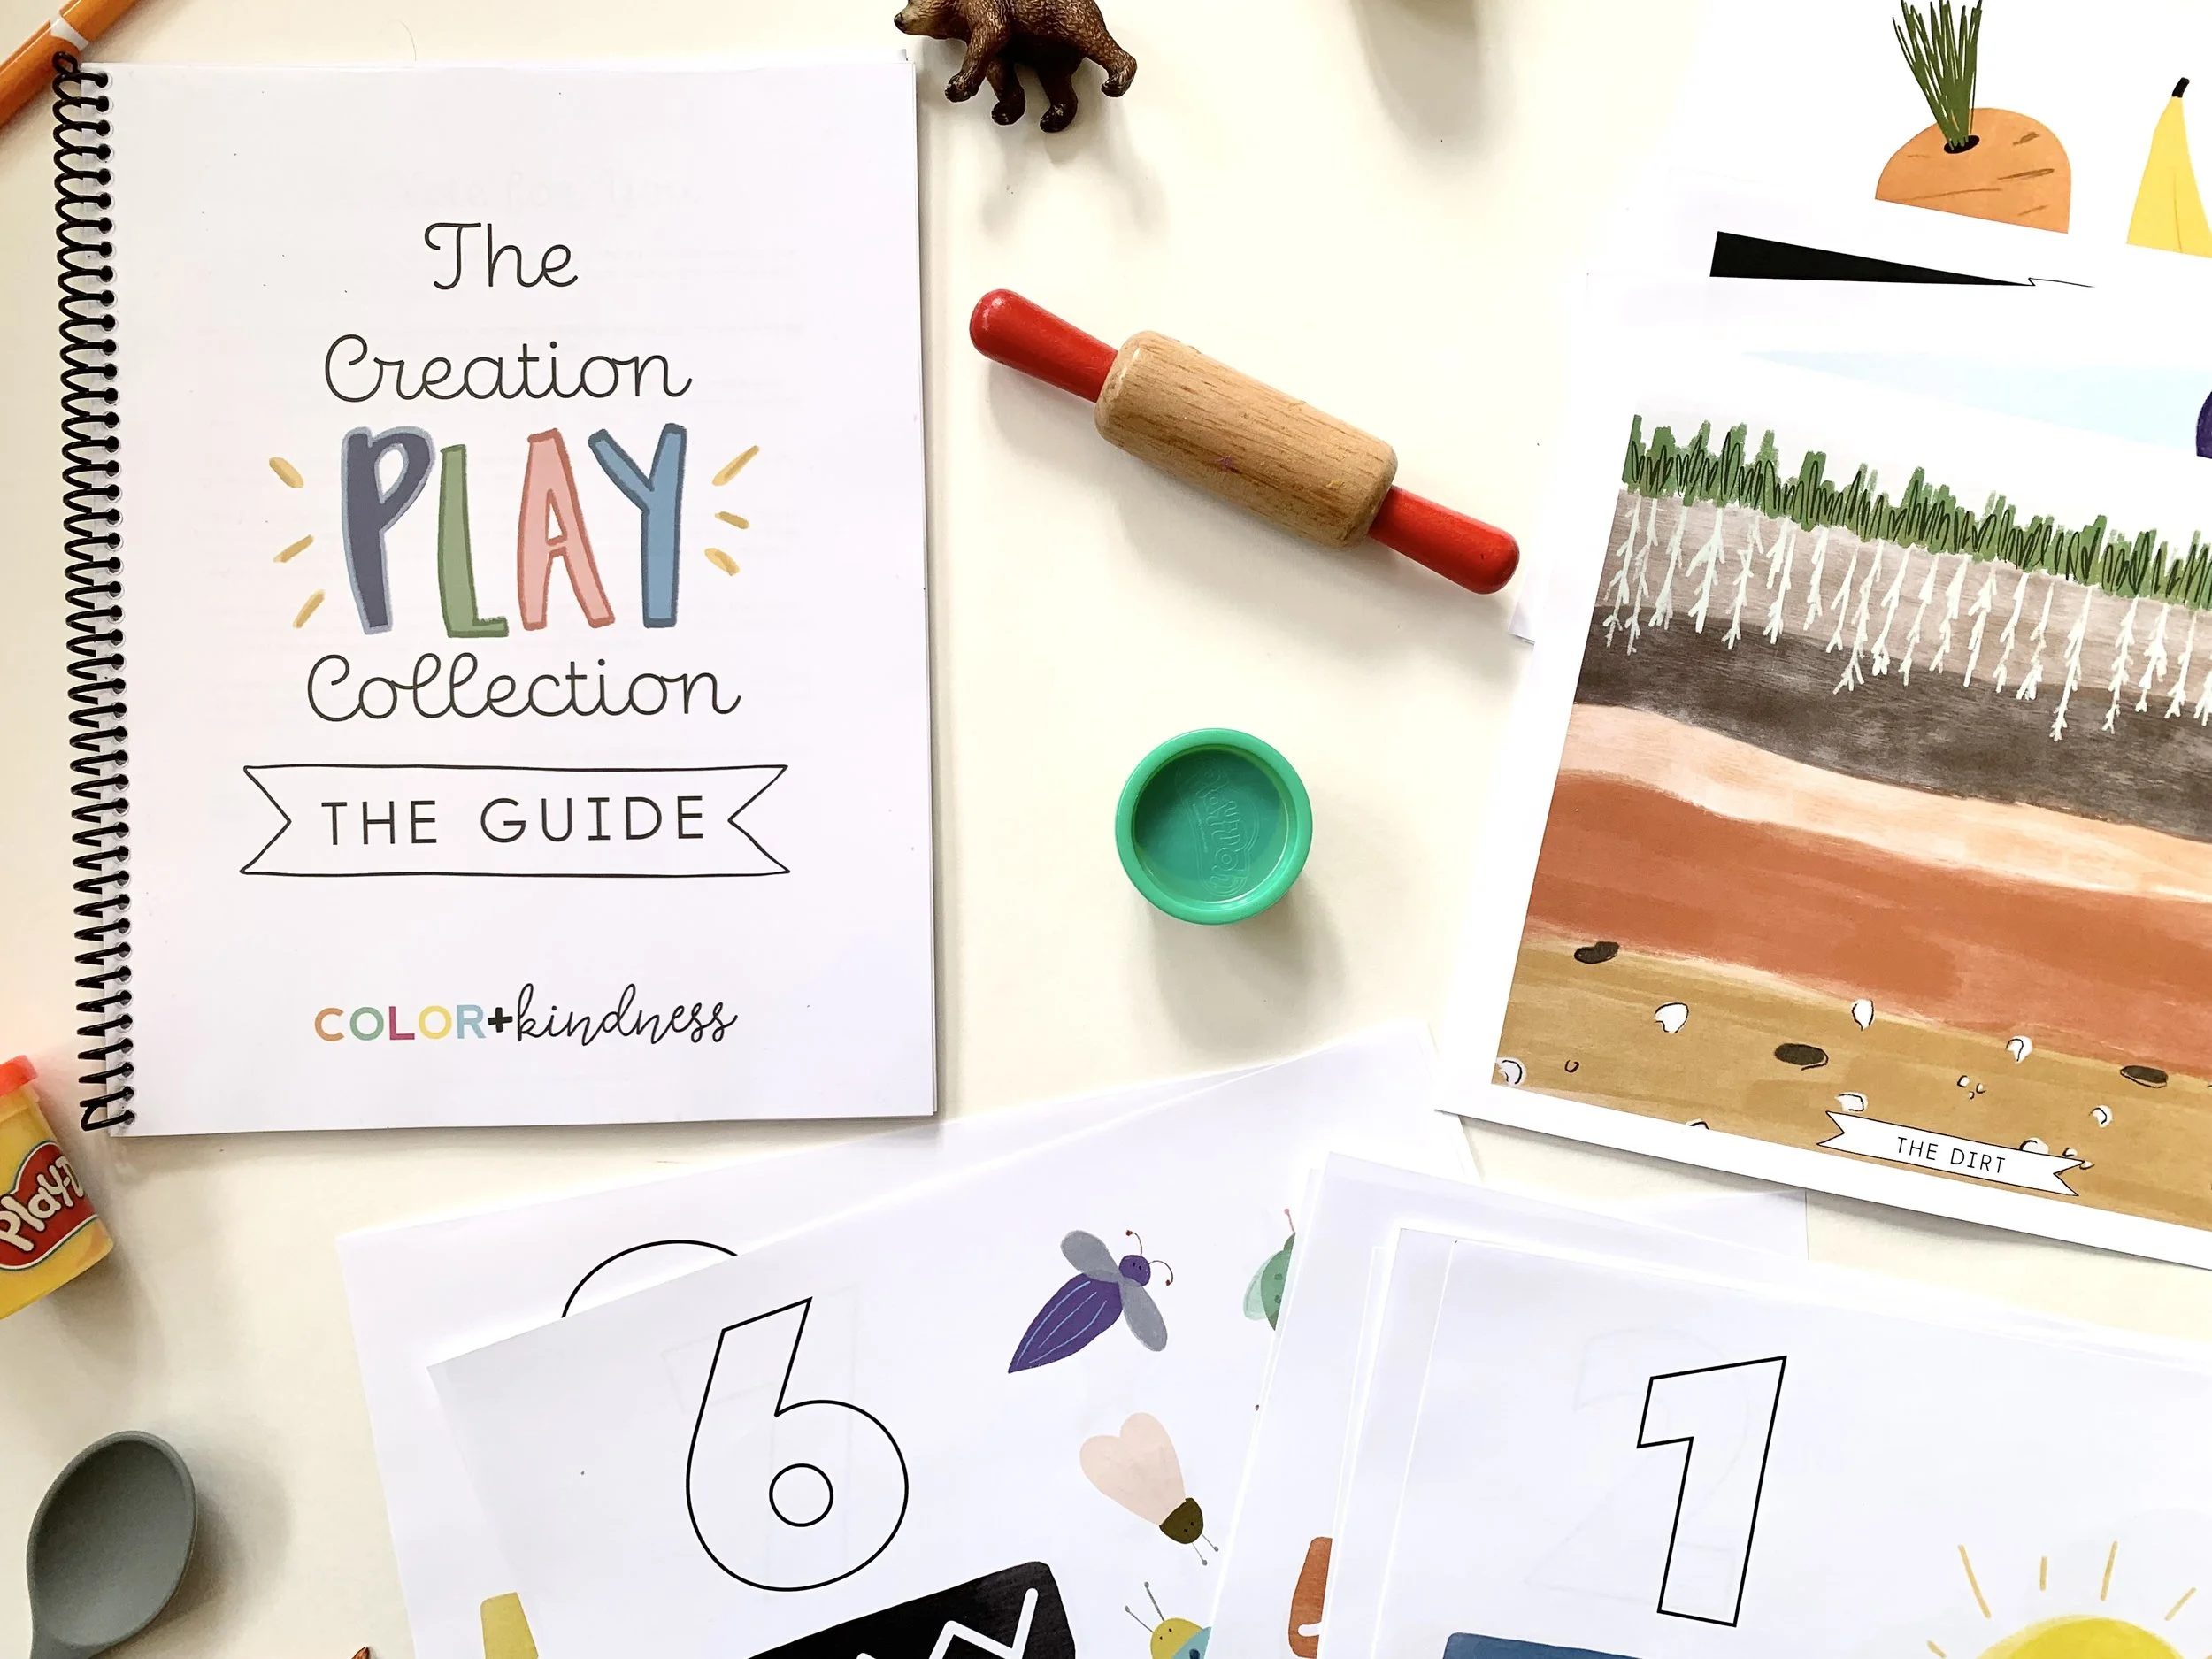
Third, the Creation Play pack is wonderful for the hot summer days that you need to retreat into the air conditioning and play at the table for a bit. It’s chock full of sensory play ideas, recipes, and activities—so it’s an easy resources to use when you just need a little something to do.

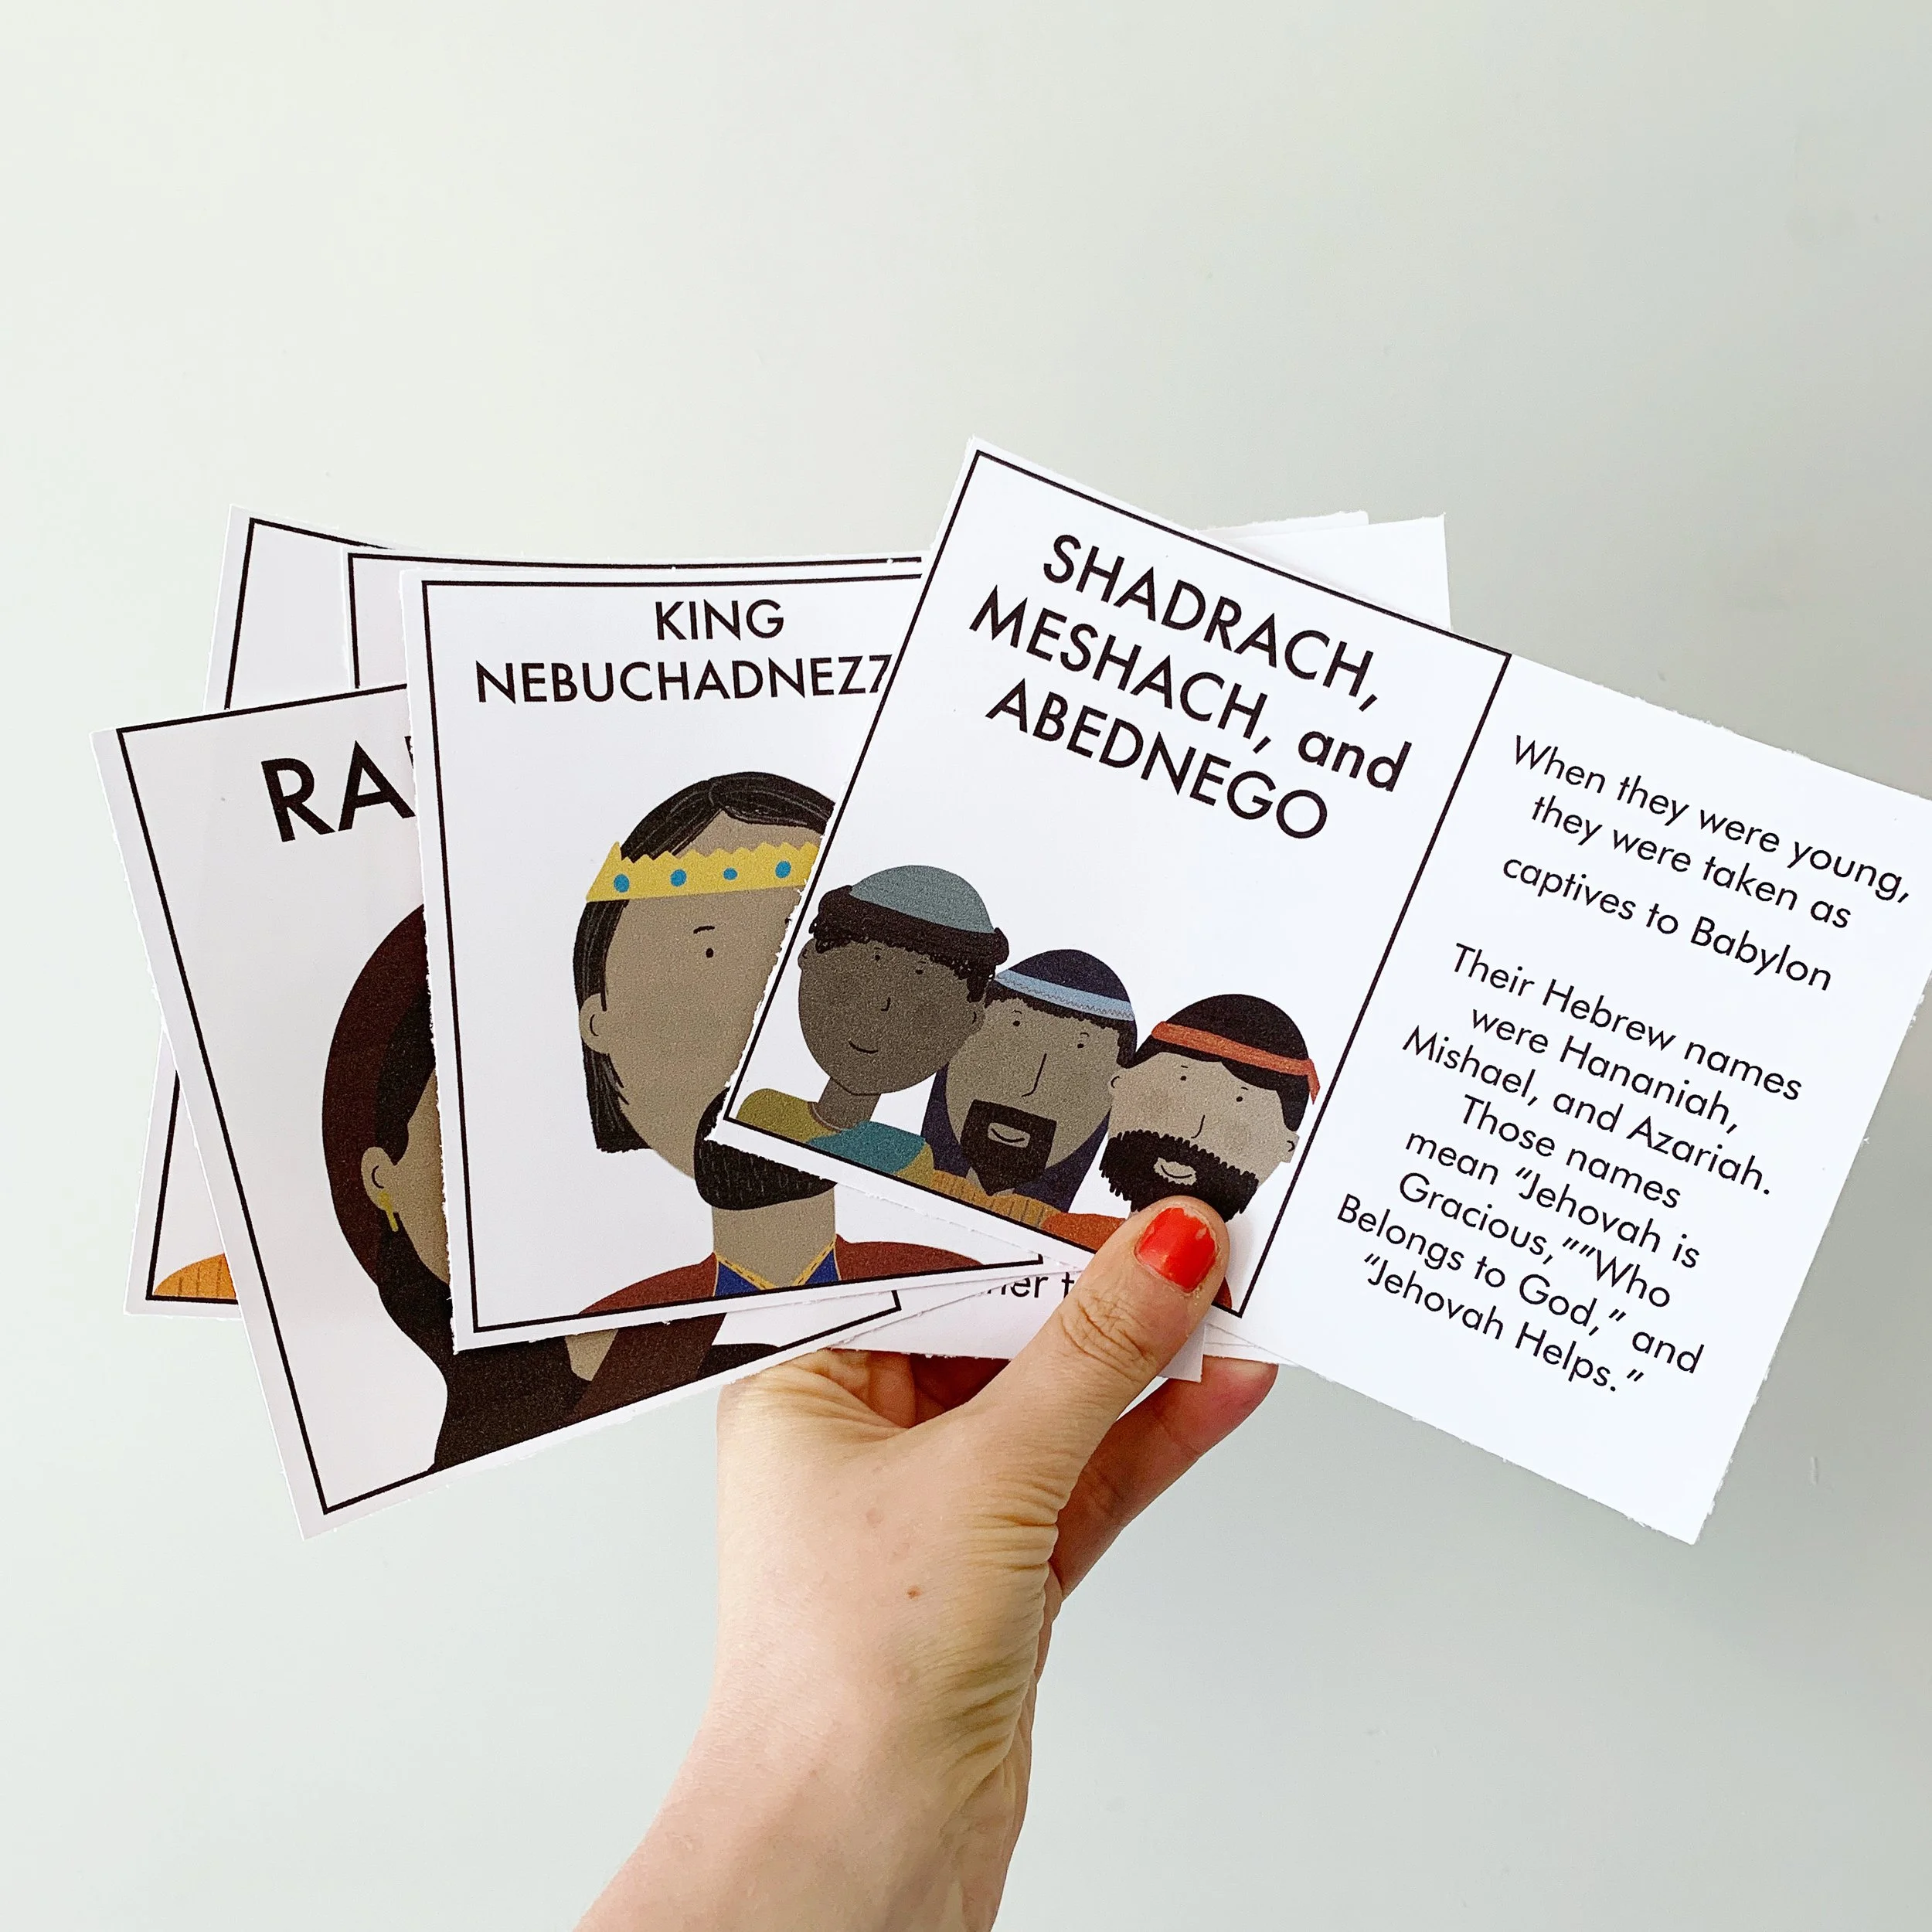
Fourth, the Bible game and activity pack is also full of easy-to-do and fun games for preschoolers (but I bet older kids will join in too!). It’s got all the ingredients for squeezing in some playful learning during those warm summer months. Plus, many of them can be easily done outside—which is definitely a plus!

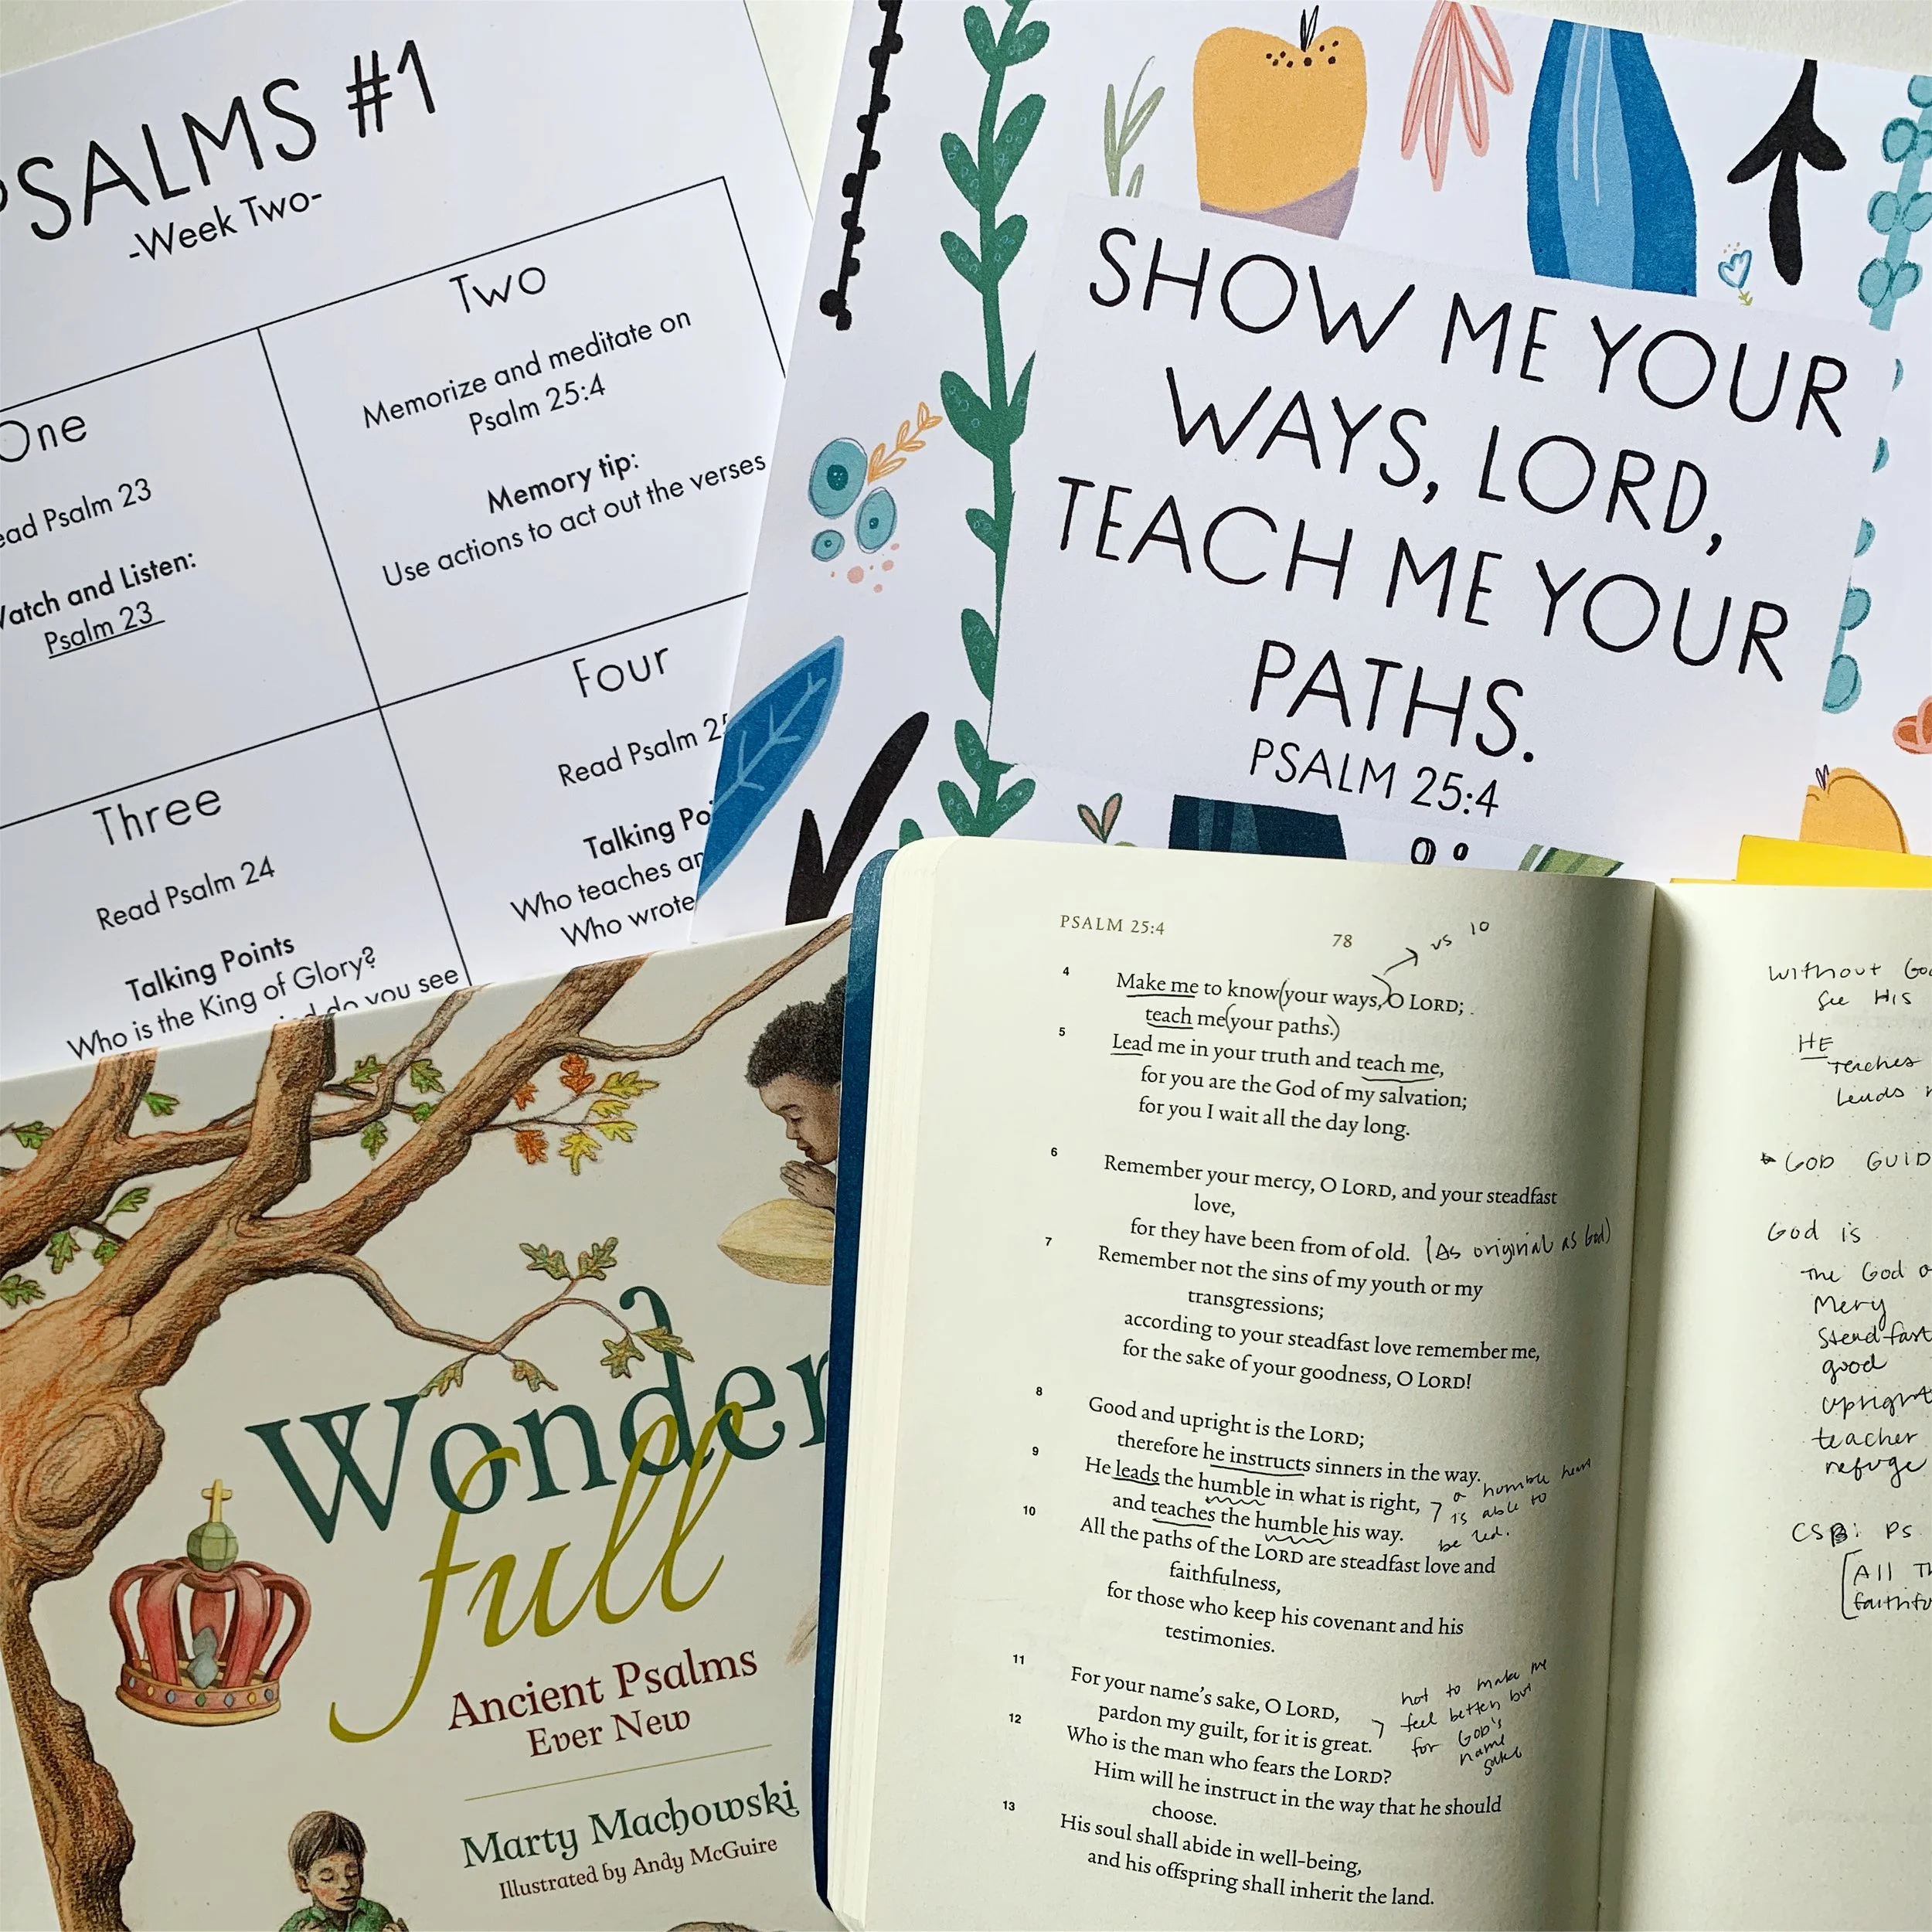
Finally, I’d recommend following along one of the lamp and light guides for intentional Bible reading time. I know how easy it is to be loosy goosy during the summer and sometimes things slide—like family Bible time (or your own personal Bible time). I promise these calendars are easy to use and provide just enough structure to stay consistent. Breakfast or bedtime would be a great time to use them :) I’m pretty partial to the Psalms bundle or the Joseph one.

Of course, there are many other resources that you could use during the summer—but these are ones that I think provide some ideas, play, and fun without being too fussy or hard to do.

Happy almost-summer, friends!

5 Bible Resources for Kids in Spanish!

During my first year of college, I spent 6 months studying in Guatemala. While there, I lived mostly on a little campus with about 8 other students, spent some time living with host families, and also traveled all over Guatemala. That time was full of sweet memories for me—taking chicken buses, meeting so many people (nationals, travelers, missionaries), volunteering, learning Spanish, walking the cobblestone streets of Antigua, seeing so much beauty (in the landscape and people!), and falling in love with the people, the language, and the country.

My time abroad launched me into the pathway of studying teaching English as a Second Language as well as as studying Spanish during my college years. Now, over twenty years later, those skilled I learned in college feel pretty rusty. But my love of language, learning, and the body of Christ in different places in the world still feels fresh and new. I have seen first-hand the value and need of having resources in your heart language. Over the years of running Color + Kindness, I’ve wanted to offer more resources in Spanish and have had a number of people as me if I would translate the resources into Spanish. As much as I wanted to, I knew that my Spanish was not at the level it needed to be to translate and write the resources in Spanish (unless I wanted it to sound like a 2nd grader wrote it—ha!).

But at the end of last year, Nathalia approached me and asked if I’d be interested in working with her to create some resources in Spanish. She saw a need and was curious if I was up for taking on the project. I thought and prayed about it—and since I had pressed pause on other projects, it finally felt like a good time to do it.

Together, we worked to create a new set of Bible Truth cards in Spanish and write up a simple Bible curriculum. Finally, it is out in the world! I’m so hopeful that it will bless and encourage families who use Spanish in their homes and are looking for solid Biblical resources.

But, there are a few other resources in the shop and free resources that include Spanish, so I wanted to share them in one blog post so that you can see what’s available (if you are on the hunt for some resources in Spanish!).

  1. Scripture cards in Spanish. These are a great resource for memorizing Bible verses in Spanish. Bright, colorful, and full of lots of awesome verses—50 verses total!

  2. Christmas learning game pack. This pack has instructions in English, but the printables for the games are in Spanish and English. This would be a great tool to use if you are a bilingual family or want to practice Spanish!

  3. Bible Verse Coloring Sheets. These are the most popular free download on the site—so grab them in you haven’t! There are coloring pages with both English and Spanish verses.

  4. Spanish Alphabet Cards. These are included in the curriculum too, but if you didn’t want to commit to a full curriulum, these are a great tool to use with your little ones. There is a letter and Bible truth on the front. On the back, there is a Bible reference to read as well as a verse to learn/read. Perfect for morning time or short family devotions!

  5. Bible Truth Curriculum in Spanish. Although similar to it’s English counterpart, the Spanish curriculum is unique and fully in Spanish (everything from the guide to the instructions are in Spanish). This is geared for ages 3-5 and has so many play-filled and truth-filled activities and learning included!

I hope that this is helpful to you if you are hunting for some fresh Bible resources in Spanish! If you use Spanish in your home, what resources would you like to see?

Simple Memory Keeping


At the end of the year, I start to feel all the feels about looking back and looking forward. This year was a sweet one for our family—lots of travel, settling into our home, and feeling more at ease with our homeschooling systems and routines. I know that not all years will look like this—so I am thankful that this year has held a lot of sweetness. Looking ahead, I’m not sure what 2024 will bring, but I do hope it brings growth, togetherness, and joy too.

For many years, I’ve felt a little stuck about how to best preserve all these family memories when it seems like life is zipping by so fast. I’ve tried online photo books (which are fun—but more time-consuming than I liked). I’ve also tried printing off a lot of photo to display and keep. Even though I loved having them physically in my hands, I didn’t really do anything with them. Oops.

This year I was determined to stick to something that I knew I could do (aka simple!). So, I grabbed a basic photo album, got my pictures printed (a few times throughout the year), and spent a little time slipping them into their spots (and writing down little notes about what we did). I mostly put in travel photos (since it seems that’s when we take a gazillion photos), but also added in some everyday photos and family fun at the end of the album too. Plus, I plan to grab a storage box to put in all the odd and ends from travel, life, and events.

Here’s what I used:

  • I bought this photo album. I actually bought two (one for this year and one for 2024). I like that they have five photos (mixed vertical and horizontal) on each page. Plus, they were on sale—so that made them super affordable! And now I’m ready for next year ;)

  • I print my photos using Mpix. I’ve printed with other companies, but Mpix is my absolute favorite. I’ve been so impressed with the quality and clarity of the photos. I even got a few pics from our Italy trip printed as an 8x10s and use them as art prints in our home. Ps. You can use this link for $10 off your first order. They also have so many other wonderful products to create!

  • For our trip to San Diego, I gave the boys each a disposable camera and got the photos developed. It was such fun to add those photos to our album. And also give our kids a taste of our childhood ;) I have this photo album that I’ll give them to put the extra photos in.

  • For photo and memory boxes, I am tempted to get this simple one for storing the extra photos and tidbits I have from the year (like ticket stubs, medals, drawings, etc). These ones are also on my list.

  • I made 4x6 inserts to add to the album to slip in and write about those details from our trips or everyday life. Ps. you can download them for free if you want to have them too!

Whether you make fancy scrapbooks, make photo books online, or do it the old fashioned way (like me!)—keep it up! Find a way to preserve and keep those memories even if you’d never done anything before (it’s never to late to try something new!).

Someday, it will be such a treasure to have these to look through and enjoy.


Adventure Together: A Family Trip to Washington DC

A few months ago, I was on the hunt for a quick getaway we could squeeze in this fall. I was looking for somewhere that we didn’t need a rental car, had affordable activities, and also cheap flights to book with miles. When I found a super slick point deal on Southwest, I booked tickets to Washington DC for a few days :) Ps. I’ll share more about miles + our free hotel stays at the end of this post!

It was such a beautiful time to visit the DC. Although the trees weren’t super colorful, the weather was perfect! Especially since we did so much walking (a LOT of walking), I was thankful we had nice fall temperatures and no rain.

To be honest, we didn’t plan a lot before this trip. We had our flights and hotel booked, a short document with a list of places we’d like to see, and that was about it! We didn’t even tell our kids we were going until about three days before the trip. Since I had snuck in some books about DC for the weeks leading up to the trip, they were super excited about going!

I’m far from an expert on Washington DC, and I feel like we hardly skimmed the surface of the city. But I’ll still share what we did (and what I wish we had time to do too!).

Day One (our first full day there): We hit up the Smithsonian Zoo because I have always wanted to see a panda in real life. And we got to see the pandas—and they were absolutely so adorable and cute! The crowd was full of giggles and laughing while we watched their clumsy and silly antics. This was definitely a highlight for me! During the second part of the day, we did a lot of walking around the city (due to some mishaps on lunch plans). We stopped at the Old Post Office building and took an elevator up to grab a great view of the city. Then, we finished our day with a visit to the National Archive Museum to see the Declaration of Independence.

Day Two: We started with a visit to the Natural History of Museum (mostly to see the rock/geology floor for my rock-loving middle guy!), enjoyed a lunch on the National Mall, and then hit up the Air and Space Museum. We wrapped up this day with some pizza and shoe shopping for one of the kids (which is what happens when someone brings shoes that aren’t super comfy for all the walking and standing—oops!).

Day Three: Hopped on the metro again (we loved using the metro!) and went to see the White House and the Lincoln Memorial. We ate lunch at the Ag building (open to visitors), but honestly, I wasn’t super impressed with the food or the prices. Oh well! We then zipped over to the Postal Museum for a quick stop, hit up the Washington Union Station for coffee, and then went on a Capital tour. And if that sounds like a lot—it was ;) We also got to go in and watch the Senate with passes from our state Senator. The kids weren’t super interested in this—but my hubby and I loved getting a front row seat to watch the government in action.

Day Four: We had some time in the morning to burn, so we took a bus to Georgetown and wandered around (with a stop for treats and coffee of course!). My hubby and I enjoyed this more than the kids—but it was a nice ending to a quick trip!

I wish we would have had time for an art museum or American history museum, but I think we squeezed in as much as we realistically could with three young kiddos. We also tried to pick things they would be interested in seeing + including them in our plans and agenda for the day :) My oldest got to be quite the pro at using the metro!

A few places we enjoyed eating:

  • District Tacos (we saved some $$ by sharing meals)

  • DC Pizza. Super yummy pizza + affordable too when you split a pizza!

  • Blue Bottle Coffee. This was inside the Union Station + so delicious! It was a bit of a splurge for coffee (but we like our afternoon coffee—ha!)

  • Falafel Inc. We grabbed a bite here in Georgetown before heading to the airport. It was so yummy, but we didn’t like that there was nowhere to sit and eat it. But, it was definitely one of the cheapest places we found to eat in DC.

How we kept this trip affordable:

  • We took the metro instead of renting a car. The metro was still a cost that added up, but it was less than renting a car and paying for parking. Plus, it was easy to navigate!

  • We used airline miles and hotel points to book free flights and hotel stays. Yes, free :) We did pay $50 for flight taxes, but that’s it!. We do a bit of “travel hacking” (building up travel points with sign-up bonuses and using our credit card instead of our debit card for normal spending). I am far from an expert in this (and we don’t go bonkers with it)—but if you are interested in how we did it, just zip me an email and I’ll share more!

  • We ate a lot of peanut butter and jelly sandwiches. Yep. Living the vacation dream there ;) We had free breakfast at the hotel, packed one meal per day, and went out for one meal per day. This helped us save so much $$—especially in a city like DC where food can be spendy. I purposely chose a hotel within walking distance to a grocery store so that we could grab some food options for meals on the go.

  • I used some cash back I had built up on Rakuten to help cover a few things here and there. It adds up :) Ps. You can grab $40 dollars to start out just by using my link (if you don’t already have an account). It’s super easy to use!

  • We stuck with the free activities/places. So many things are free in DC (so that helped!), but we didn’t do any special tours or go to any museums that weren’t free. For us, we do less (avoid a lot of extras) when we travel so that we can travel more. In other words, we try to keep our costs low when we travel so that we don’t blow our entire travel budget on one trip since we like to travel multiple times a year. I know many who love to go all out when they travel—and that’s okay too!

  • I looked ahead and created a short list of affordable places to eat. This helped us not wander around with rumbly stomachs and just eat at the first place we saw. Having a short list of food options also helped us plan a bit better too!

  • This isn’t really a “keep it affordable tip” but more of a “keep it doable” perspective. We prioritize travel in our budget, so that means we set aside money every month so that we can draw from it when it’s time for a trip. This helps us stick to our budget as well as not go into any travel debt. If you want to travel more, saving even a little bit every month can add up! Ps. YNAB is a great budget tool that we use and love!

Here’s what we don’t leave behind when we travel:

  • Our Yoto players for the kids (so helpful on the plane and in the hotel at night when everyone needs to just chill!)

  • We invested in a few Walker Family duffles last year + they have been so amazing! I highly recommend them if you are looking for quality travel bags. Ps. They usually have a few good sales per year—so I’d wait and grab items while they are on sale.

  • A flexible mindset. Traveling with kids is simply parenting in a new place. We didn’t always have fantastic attitudes or awesome listening. There were complaints, there were sore feet, there were kids learning how to navigate a new place, there were tired kids (and parents), there were spilled lattes, and there were snags in our plans. But! Doing our best to be patient, including our kids in our plans, and encouraging them when things are less than ideal can go a long way! Ps. We sometimes played a scavenger hunt game when we walked to help distract the kids. I’d say: Find a yellow square, something round, a green sign…etc). They also liked to add their own things to find!

All in all, I think DC in a fantastic place to enjoy for a few days with your family. I know we’ll be back someday!

What places are on your family bucket list?

Yoto for the Win: Our Favorite Audio Tool and Tips to Keep it Affordable

For years, I had heard about the Yoto play on and off from blogs and social media. I was intrigued, but honestly, it seemed like a lot of money to spend.

Couldn’t we just listen to audiobooks on the bluetooth speaker? Well, we sure could. And we used this method for a long time. However, it became difficult to find content everyone wanted to listen to or for the kids to use it during quiet time.

Then, I noticed that Yoto had the mini’s (which are more portable and individual) than the larger Yoto. So, we decided to grab some for the kids for their Christmas gift last year.

And it has been one of the best decisions ever. Well, you know, as far as buying toys goes—ha!) Even almost a year later, they are still used every single day. Besides LEGO and magnetic tiles, it is the most used and loved “toy” in our house. Plus, they’ve gone on roadtrips, airplanes, and day trips with us :)

Here’s what I love about them:

  • Portable and pretty solid (they’ve been dropped a lot and haven’t broken yet)

  • Easy to use for the kids (no fancy lights, buttons, etc). I like that it takes away the distraction to just monkey with the buttons

  • Everyone can choose audio content they enjoy (and they’ll often enjoy it together too)

  • Can use it for learning and school

  • Gives the kids a screen-free option

What I don’t love:

  • They are small and can get lost easily if the kids aren’t paying attention to where they put it (which has happened many times…)

  • The cost of new content was a bit of surprise for me (but I’ve learned ways to keep it affordable—scroll down for ways I’ve helped keep costs down!)

  • The Yoto club has been good for getting started, but I’m finding less and less options we like as time goes on.

Next, I’ll share some of my favorite ways to get audio content:

Yoto’s Website and Club:

This is the simplest way to get new cards, but the costs can add up. It’s $10 per month for two cards and free shipping—which I think is a great deal if you are just starting. Right now, I plan to do a few more months of the club and then cancel since we have most of the cards I’m interested in. They only offer a certain selection for the club members.

Still, Yoto has a great library of titles that aren’t part of the club. Here are some of our favorites that we have in our home (most of these we’ve gotten through the club). This is not a list of all the cards we have, but I’m just picking our favorites :)

Stories and books:

Music:

Buying the Yoto cards directly is definitely the most convenient, but it is not always the most affordable way to get Yoto cards. What we do most of the time is use the blank Yoto cards to make our own cards. I don’t have a lot of blank cards (just one pack of 10), but I can remove the old content and put on new content very easily. There are a lot of tutorials for how to make your own cards online. Once you get the hang of it, you’ll feel like you are bringing back those days of burning CDs in your dorm room ;)

A few tips for making your own cards:

  • Have a “library card” for each kiddo. I have a card for each of my boys and they can use it to put on any content from our audio library.

  • I sometimes use vinyl printer paper to make my own labels for cards. But I’m often lazy, so I just put a piece of tape on the card and write the title on there with a sharpie.

My favorite resources for getting audio content for the cards are these places:

  • Momma Bear Audio: I love this monthly subscription for fresh (and wholesome!) content for Yoto every month. It’s super affordable (just 2.99 per month). Plus, if you use this code: COLORANDKINDNESS10 you’ll get 10% off monthly or yearly subscriptions. Ps. I am an affiliate—but because I truly love the content!

  • Libro. I have gotten a lot of content for a much lower price than Yoto. For example, I’ve gotten deals on the entire Narnia collection, Henry Huggins, etc. I find a lot through Libro, so I do have a subscription. But you do not need a subscription to purchase on their site. Ps. You can use this link to start a membership and get a free audiobook. The memberships can be canceled at any time. So, even if you don’t continue using it, you still get one free download ;) I’ve also used Downpour to find affordable content. Both Libro and Downpour make it easy to download the audiobooks and add them to your Yoto library.

  • Podcasts. Hands down, these are such an easy way to get quality audio for FREE! You can link the RSS feed and put it on a card. And suddenly, you have hours of content without paying a dime.

Here are a few favorites from other resources:

All in all, the Yoto player has been a much loved item in our home. For me, the biggest downside is the cost of new content, but there are definitely ways to keep it more affordable if you are creative and keep on the lookout for good deals. Plus, Yoto cards have excellent resell value, so you can sell them and use the funds to order new ones (I’ve done this through Facebook Yoto card selling groups).

However, there are many ways to add audiobooks into rotation at home—so this is definitely not the only way (nor the best way for your family). Ultimately, do what works best for your family and budget :)